FreeBSDのpkgからNginxをインストール
FreeBSD をインストールした HTTP ( WEB ) サーバーを pkg を使って Nginx で構築してみます.
注意)Nginx の fastcgi_cache_purge モジュールはpkg からはインストールできませんでした.
Fastcig_cache を検討していて、ワードプレスから Nginx のキャッシュを purge ( パージ、追放 ) する予定のある方は、ports で nginx-full または、Nginx fastcgi_cache_purge モジュールを選択(すぐ下のリンクで)してインストールした方が良いかもしれません. ( 2022/02現在 )

Nginx fastcgi_cache_purge モジュール付きでインストール
ワードプレス プラグイン Nginx helper を動作させる Nginx のモジュール付きインストール方法
pkg search で Nginx のパッケージを検索する.
					 # pkg search nginx
modsecurity3-nginx-1.0.2       Instruction detection and prevention engine / nginx Wrapper
nginx-1.20.2_3,2               Robust and small WWW server
nginx-devel-1.21.5_3           Robust and small WWW server
nginx-lite-1.20.2_3,2          Robust and small WWW server (lite package)
nginx-naxsi-1.20.2_3,2         Robust and small WWW server (plus NAXSI)
root権限からpkgを使って Nginx をインストールしてみよう.
					#pkg install nginx
Proceed with this action? [y/N]: y
-----New packages to be INSTALLED:-------
nginx: 1.20.1_3,2
Nginx のインストールはこれだけで終わります.
Nginxの起動
Nginxの操作確認ですが、/etc/rc.conf に nginx_enable=”YES” を記入と、nginxを起動をしてみましょう.
※次回からのNginxの起動は、/etc/rc.confにnginx_enable=”YES”を記入したので、FreeBSDの起動ごとに自動でNginxも起動します.
					#service nginx enable
#service nginx start
Nginxが起動しているか確認してみましょう
# ps ax | grep nginx
					 5384  -  Is       0:00.00 nginx: master process /usr/local/sbin/nginx
 5385  -  I        0:00.03 nginx: worker process (nginx)
このようなメッセージが返ってくればOKです.
Nginxの設定ファイル
設定ファイルは
/usr/local/etc/nginx/nginx.conf
に書かれています.
中に書かれている内容を見てみましょう.
自分がファイルの内容を見るのに使うのは「less ファイフ名」です.
行番号の表示は「-N」オプションをつけて「less -N ファイフ名」とすると良いと思います.
					# less /usr/local/etc/nginx/nginx.conf
# less -N /usr/local/etc/nginx/nginx.conf
行番号を表示させると
					40 server {
41 listen 80;
42 server_name localhost;
43
44 #charset koi8-r;
45
46 #access_log logs/host.access.log main;
47
48 location / {
49 root /usr/local/www/nginx;
50 index index.html index.htm;
51 }
52
53 #error_page 404 /404.html;
FreeBSDの場合は、49行あたりに「root /usr/local/www/nginx;」と書かれています.
このディレクトリ(root /usr/local/www/nginx)に書かれている内容がwebブラウザに表示されることになります.
50行あたりに 「index index.html index.htm;」と書かれており、ファイル名 index.htmlとindex.htmを表示することになります.
まとめると、WEBブラウザでこのWEBサーバーにアクセスすると、サーバー内のディレクトリ/usr/local/www/nginxにあるファイル名 index.htmlとindex.htm が表示されます.
index.html に書かれている内容は、
# less /usr/local/www/nginx /index.html
					/usr/local/www/nginx # less index.html

<!DOCTYPE html>
<html>
<head>
<title>Welcome to nginx!</title>
<style>
    body {
        width: 35em;
        margin: 0 auto;
        font-family: Tahoma, Verdana, Arial, sans-serif;
    }
</style>
</head>
<body>
<h1>Welcome to nginx!</h1>
<p>If you see this page, the nginx web server is successfully installed and
working. Further configuration is required.</p>
<p>For online documentation and support please refer to
<a href="http://nginx.org/">nginx.org</a>.<br/>
Commercial support is available at
<a href="http://nginx.com/">nginx.com</a>.</p>
<p><em>Thank you for using nginx.</em></p>
</body>
</html>
html形式で書かれています.
nginx.confの続きです.
42 行に「server_name localhost;」と書かれているので、サーバー本体のwebブラウザのURLにlocalhostと入れれば、、Nginxの起動画面がみることができます.
しかし、今回はリモートで操作するサーバーを作る目的です.
GUIのX-サーバーを入れて、CPUのリソースを使うのは、今ひとつですね.
従って、同じローカルのネットワークにつながっているwebブラウザの入っている 普段使用しているPC ( Windows Mac など) で確認します.
Nginxの動作確認
ローカルのLAN(Local Area Network)内のwebブラウザが動作しているパソコンから、webサーバー(Nginx)が動いているのか確認する方法は
webブラウザのURLにサーバーのIPアドレスをダイレクトに入れるだけです.
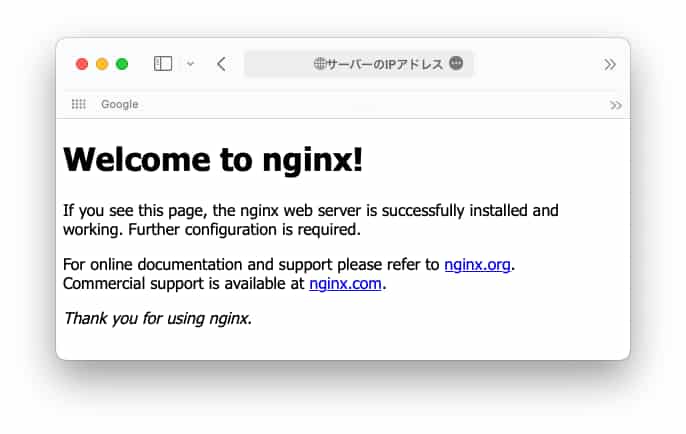
nginxのインストールと動作確認はOKです.
/usr/local/www/nginx /index.htmlのファイル内容がwebブラウザに表示されるだけですね.
この回は、FreeBSDでNginxをpkgからインストールして、Nginxの起動と動作確認をしました.
Nginxを動作させてWEBブラウザーから見えるようにするだけならば、難しくないと思います.
NginxとPHP-FPMと連携させる
ここからの内容は、php がすでにインストールされて動作していることが前提条件です.
phpのインストールがまだ、お済みでない方は、下の「WordPress に必要な PHP74 の機能拡張をインストール」を先に済ませてください.

WordPress に必要な PHP74 の機能拡張をインストール
FreeBSDのパッケージ管理の pkg を利用して、ワードプレスに適応した機能拡張を示しながらPHPをインストールします.
Nginxで php を動作させるには、php-fpm という方法を使うことになっています.
さらに、Nginxとphp-fpmと連携させる方法は2種類あります.
- unix sock
- tcp
Nginx のデフォルトは tcp なので、動作確認は tcp (127.0.0.1:9000) を使用します.
unix.sock と tcp の使い分けは、
nginx と php-fpm のやり取りをするのに、同一サーバー内で行う場合は、unix.sock の方がパフォーマンスが高いらしいが、テストしたサイトによっては、tcp 接続でも大きな差はなかったようにことを書いてあったサイトもありました.
nginx と php が異なるサーバーにある場合は、tcp で接続するしかない.
と思いますが.
/usr/local/etc/nginx/nginx.confを書き換えます.(デフォルトの設定ファイルは nginx.conf-distです)
server { } と書かれいているところを抜き出して、
					server {
listen 80;
server_name localhost;
#charset koi8-r;

#access_log logs/host.access.log main;

location / {
root /usr/local/www/nginx;
index index.php index.html index.htm;
}

#error_page 404 /404.html;

# redirect server error pages to the static page /50x.html
#
error_page 500 502 503 504 /50x.html;
location = /50x.html {
root /usr/local/www/nginx-dist;
}

# proxy the PHP scripts to Apache listening on 127.0.0.1:80
#
#location ~ \.php$ {
# proxy_pass http://127.0.0.1;
#}

# pass the PHP scripts to FastCGI server listening on 127.0.0.1:9000
#
location ~ \.php$ {
 root html;
 fastcgi_pass 127.0.0.1:9000;
 fastcgi_index index.php;
 fastcgi_param SCRIPT_FILENAME /scripts$fastcgi_script_name;
 include fastcgi_params;
}

# deny access to .htaccess files, if Apache's document root
# concurs with nginx's one
#
# deny access to .htaccess files, if Apache's document root
# concurs with nginx's one
#
#location ~ /\.ht {
# deny all;
#}
}
index の項目に index.php を追加
php-fpmを動作させるためには
					location ~ \.php$ {
 root html;
 fastcgi_pass 127.0.0.1:9000;
 fastcgi_index index.php;
 fastcgi_param SCRIPT_FILENAME /usr/local/www/nginx$fastcgi_script_name;
 include fastcgi_params;
}
のコメント#を消して有効にすることです.
デフォルトの nginx と php-fpm の接続設定は、
fastcgi_pass が 127.0.0.1:9000 がTCP接続のようです.
同一サーバー内で接続するのであれば、 UNIX SOCKET 接続の方がぱフォーマンンスが高いとされているので、変更した方が 良いかも知れませんね.
fastcgi_pass unix:/var/run/php-fpm.sock;
fastcgi_param SCRIPT_FILENAME /scripts$fastcgi_script_name; の 部分がうまく認識できない場合はダイレクトにlocationに書かれているrootのパス
root /usr/local/www/nginx;
を使って
fastcgi_param SCRIPT_FILENAME /usr/local/www/nginx$fastcgi_script_name;
( rootのパスはサイトのディレクトリで、各自が変更してください. )
と書くと動作しますが、
fastcgi_param SCRIPT_FILENAME $document_root$fastcgi_script_name;
fastcgi_param SCRIPT_FILENAME $document_root$fastcgi_script_name;
$document_rootの部分と対応する 記述が
location / {
root /usr/local/www/nginx;
index index.php index.html index.htm;
}
ロケーションの中の /usr/local/www/nginx が対応しています.
root /usr/local/www/nginx が location { } の中にあるとうまく認識できないようです.
server {
listen 80;
server_name localhost;
#charset koi8-r;
続く
のように、server { } 側に置くと動作するので、試してみてください.
ローカルで Nginx と php-fpm が動作可能な設定
ローカル環境で、php-fpm と Nginx が動作可能な nginx.conf 設定ファイルのまとめ.
- root /usr/local/www/nginx の位置の変更
- fastcgi_pass unix:/var/run/php-fpm.sock; 追記とコメントアウト
- fastcgi_param SCRIPT_FILENAME $document_root$fastcgi_script_name;
に変更することで、php のファイルが見れるようになったと思います.
/usr/local/www/nginx にphpinfo.php を作ってブラウザから見ることができれば、動作確認は OK です.
					server {
listen 80;
server_name localhost;
#charset koi8-r;

root /usr/local/www/nginx;

#access_log logs/host.access.log main;

location / {
#root /usr/local/www/nginx;
index index.php index.html index.htm;
}

#error_page 404 /404.html;

# redirect server error pages to the static page /50x.html
#
error_page 500 502 503 504 /50x.html;
location = /50x.html {
root /usr/local/www/nginx-dist;
}

# proxy the PHP scripts to Apache listening on 127.0.0.1:80
#
#location ~ \.php$ {
# proxy_pass http://127.0.0.1;
#}

# pass the PHP scripts to FastCGI server listening on 127.0.0.1:9000
#
location ~ \.php$ {
root html;
#fastcgi_pass 127.0.0.1:9000;
fastcgi_pass unix:/var/run/php-fpm.sock;
fastcgi_index index.php;
include fastcgi_params;
#fastcgi_param SCRIPT_FILENAME /scripts$fastcgi_script_name;
fastcgi_param  SCRIPT_FILENAME  $document_root$fastcgi_script_name;
}

# deny access to .htaccess files, if Apache's document root
# concurs with nginx's one
#
# deny access to .htaccess files, if Apache's document root
# concurs with nginx's one
#
#location ~ /\.ht {
# deny all;
#}
}
Nginx設定の変更を適用するには
ファイルを書き換えても動作中のNginxの設定は、変更されないので、Nginxのリスタートをしましょう.
#service nginx restart
					Performing sanity check on nginx configuration:
nginx: the configuration file /usr/local/etc/nginx/nginx.conf syntax is ok
nginx: configuration file /usr/local/etc/nginx/nginx.conf test is successful
Stopping nginx.
Waiting for PIDS: 1395.
Performing sanity check on nginx configuration:
nginx: the configuration file /usr/local/etc/nginx/nginx.conf syntax is ok
nginx: configuration file /usr/local/etc/nginx/nginx.conf test is successful
Starting nginx.
これで、新しいNginxの設定がリスタートします.
設定ファイルに不備があるとエラーになり、前の設定のままになります.
設定の変更で多いエラーは、自分の場合ですが、
スペルミス、全角のスペースが入った場合、最後に「;」が抜けた場合、server { } カッコ「{ }」で囲ってあるのですが、括弧が抜けた場合が多いです。
エラーには行番号が表示されますので
# less -N /usr/local/etc/nginx/nginx.conf
でエラーの行番号から見つけることができます.
php-fpm の動作確認の方法は、ここをクリック!
NGINX 主要コマンド
					nginx -h
    NGINXヘルプメニューを表示します。

nginx -v
    NGINXバージョンを表示します。

nginx -V
    NGINXバージョン、ビルド情報、NGINXバイナリに組み込まれているモジュール を示す構成引数を表示します。

nginx -T
    NGINX構成をテストします。

nginx -s signal
    フラグはNGINXマスタープロセスに信号を送ります。stop、quit、reload、reopen のような信号を送信できます。stop信号はNGINX プロセスを即座に中止します。quit 信号はNGINXプロセスを処理中のリクエストの処理後に停止します。reload信号 は構成をリロードします。reopen信号は、ログファイルを再度開くようにNGINX に指示します。